Raising two beautiful children and learning along the way in Christchurch, New Zealand.
Friday, November 30, 2012
Counting Down to Christmas!
Tomorrow is the first day of December... which means it's time to start decorating :-)


First out of the box is this fantastic little indoor sandbox Nativity Scene. I can't find any currently available, but the link will take you to the other ones stocked by Rainbow Resources which is where I got ours. As an aside, Little Sister has a different one awaiting her on Christmas day.
Lots of fun has been had... mostly burying various figures, "so that bad king Herod" won't find them ;)
Little Sister needed her sunglasses on because she was "in the desert".
I may be cursing this one by Christmas time if the sand doesn't stay put, but for now it's a big thumbs up!
Thursday, November 29, 2012
Checkered Cake
For his recent birthday Big Brother requested a chess board cake. I had an idea in my head but wasn't sure if I could make it work... I really wanted the inside to be checkered too! After a bit of fiddling about, here it is...
How to make a checkered cake
Big Brother and Little Sister have food allergies, so our cakes have to be gluten and dairy free. While I just used a whole batch of batter for each layer (so four cakes) I imagine you could probably split your batter (or cut your cakes into two layers if you used gluten based cakes).
Prepare four cakes, two of each of your chosen colour. I used white and brown. For a chess set with 3cm squared I needed a 12 inch cake.
Because I only had one tin I used baking paper so I could quickly lift out the cooked cake and start the next one.
Prepare templates 9 and 6cm square.
Cut all four cakes using the templates.
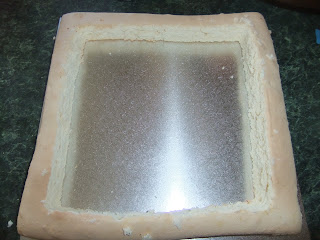
Carefully transfer the biggest square of one cake onto a tray or board. It doesn't matter if it breaks while transferring, but it's nice if it doesn't. I wonder if freezing would make it easier?
Transfer the next smallest square of the other coloured cake. Then the smaller one of the first cake. As you can see, I really should have had one more smaller square in there.
If you want to you could paint a sugar syrup or even some buttercream on to stick things together as you place each piece in, and between the layers.
Now put the biggest piece of the cake you didn't start with last time on top of the first layer.
You get the idea... keep alternating colours until...
Voila!
This leaves you with one "whole cake" worth of squares left over - you could make another layer on your cake if you wanted, or keep them for later. (Mine are in the freezer for emergency "bring cake" occasions).
Buttercream the whole shebang. Try not to eat too much of the left over buttercream.
Place a layer of white fondant over the cake. One day I'll learn how to do nice even corners and edges.
This is marshmallow fondant - take some marshmallows and a splash of water, microwave for a few seconds (20 or so) until they puff up and melt a bit. Stir until smooth and then start adding icing sugar. Keep adding and stirring until it starts to look like fondant. Trust me - it looks like a terrible sticky mess for a while, but if you keep adding icing sugar, it'll get there. You'll probably have to dump it out and knead the last of it in by hand.
Mark the centre of the cake and make a string line (to keep the squares straight).
Roll out a super thin layer of fondant and measure and cut squares. (Or in my case, get your husband to, because he's so much neater than I am)
Working from the centre, lay the squares in a checkerboard pattern. Lightly dampen the cake so they stick.
Carefully clean excess icing sugar off the squares.
I was pleased to find this white "chocolate" which was dairy free. It melted nicely and poured easily into my totally awesome chess ice cube trays from Think Geek with care I was able to only half fill the trays so I could join two pieces and make 3D chess pieces. The dark chocolate was thicker and was harder to pour, so I ended up making them the full depth of the ice cube tray. They're still cool, just not "real" chess pieces.
A little ribbon around the edge of the board (and the bottom too, to hide my inexpert edging), carefully place the pieces, add candles, and there it is. A chess board cake.
All that remains is to cut it open...
Sunday, November 11, 2012
A Grand Adventure
Big Brother had one more birthday present to come... the Grand Adventure!
 Bright and early on Wednesday morning we jumped in the car and headed to the airport, and hopped on a plane to Auckland
The wonderful Jetstar crew let him have a look around the cockpit, and even pretend to fly the plane, then we headed off on the next leg of our adventure.
First stop: Butterfly Creek
Butterflies
Crocodiles
Spiders
Feeding a Lamb
Then off again, on the main part of the adventure!
We walked along Queen Street, and just happened to come to a theatre...
This is the moment when we asked him if he'd like to go and see the show
And so we settled in to watch Mary Poppins
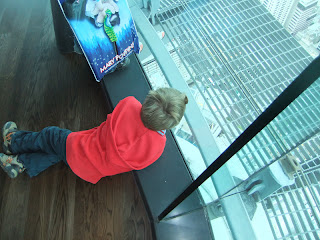
To round off the day we headed up the Sky Tower
Then it was on the plane and home to bed!
A Grand Adventure was had by all... and it was nice to spend time with Big Brother, and get to see how much he has grown up lately... he's quite good company nowadays
Thursday, November 8, 2012
Sunday, November 4, 2012
Turning Six
Big Brother is six! Today he had a chess party...


Preparations the night before.. yay Dad, a giant wall chess board!
Presents waiting for morning
Big Brother was allowed to wake us at 6:30 as it was his birthday. He arrived in our bed promptly at 6:30... he tells me he checked the first time at 5:17 (yawn)
A big smile for the first present
This might not have looked very exciting today, but I think he'll be very happy on Wednesday
The big exciting present today...
And this is what he did for the rest of the morning:
This afternoon he had a wonderful time playing with friends and eating lots of sugar...
tonight he tried to stay up long enough for fireworks, but he crashed and burned before it got dark... so did Little Sister
He had a great day... and now he's six!
Subscribe to:
Comments (Atom)


